Table of contents
- Why Winston..?
- Let’s get started!
- Prerequisite:
- 1. The first step is to install all required packages
- 2. Once installation is complete, let's dive into configuring MongoDB connection with Mongoose, If the connection is set already you can skip this step
- Let’s start creating a Winston Transport connection with MongoDB and a common logger function
- Now let’s start using the exported logger function in our endpoints
- Visualizing the logs
- To sum it up
In the world of software development, the most essential part is understanding the behaviour of applications and systems. That’s where logging services come into play. A logging service is a powerful tool that captures, stores and manages log messages, which intern provides the developers and system administrators with valuable information about the software’s performance, behaviour, and potential issues. In this article, we’ll explore the logging service using Winston.
Why Winston..?

Winston simplifies the process of configuring and customizing loggers in Node.js applications. It provides a flexible and intuitive API that allows developers to define various log transports, log levels, and formatting options. Whether you want to log to the console, files, databases, or even third-party services, Winston makes it straightforward to set up and configure log output destinations.
Let’s get started!

Prerequisite:
Before getting started we need to check if node and npm are preinstalled.
node -v
npm -v
If not please check the below links for the steps to install them.
Click here to Download Node Js
1. The first step is to install all required packages
Here we are going to see Winston Logging with MongoDB as a transport.
Now try to run the below
npmcommand on the terminal.
npm install winston winston-mongodb
2. Once installation is complete, let's dive into configuring MongoDB connection with Mongoose, If the connection is set already you can skip this step
Run the below
npmcommand on the terminal to install the Mongoose package.
npm install mongoose
For initializing the MongoDB connection with Mongoose you can use the below snippet.
Here you need to replace the
MongoDB stringwith yours and add theUsernameand thepasswordthat you would have opted to while creating the Database.
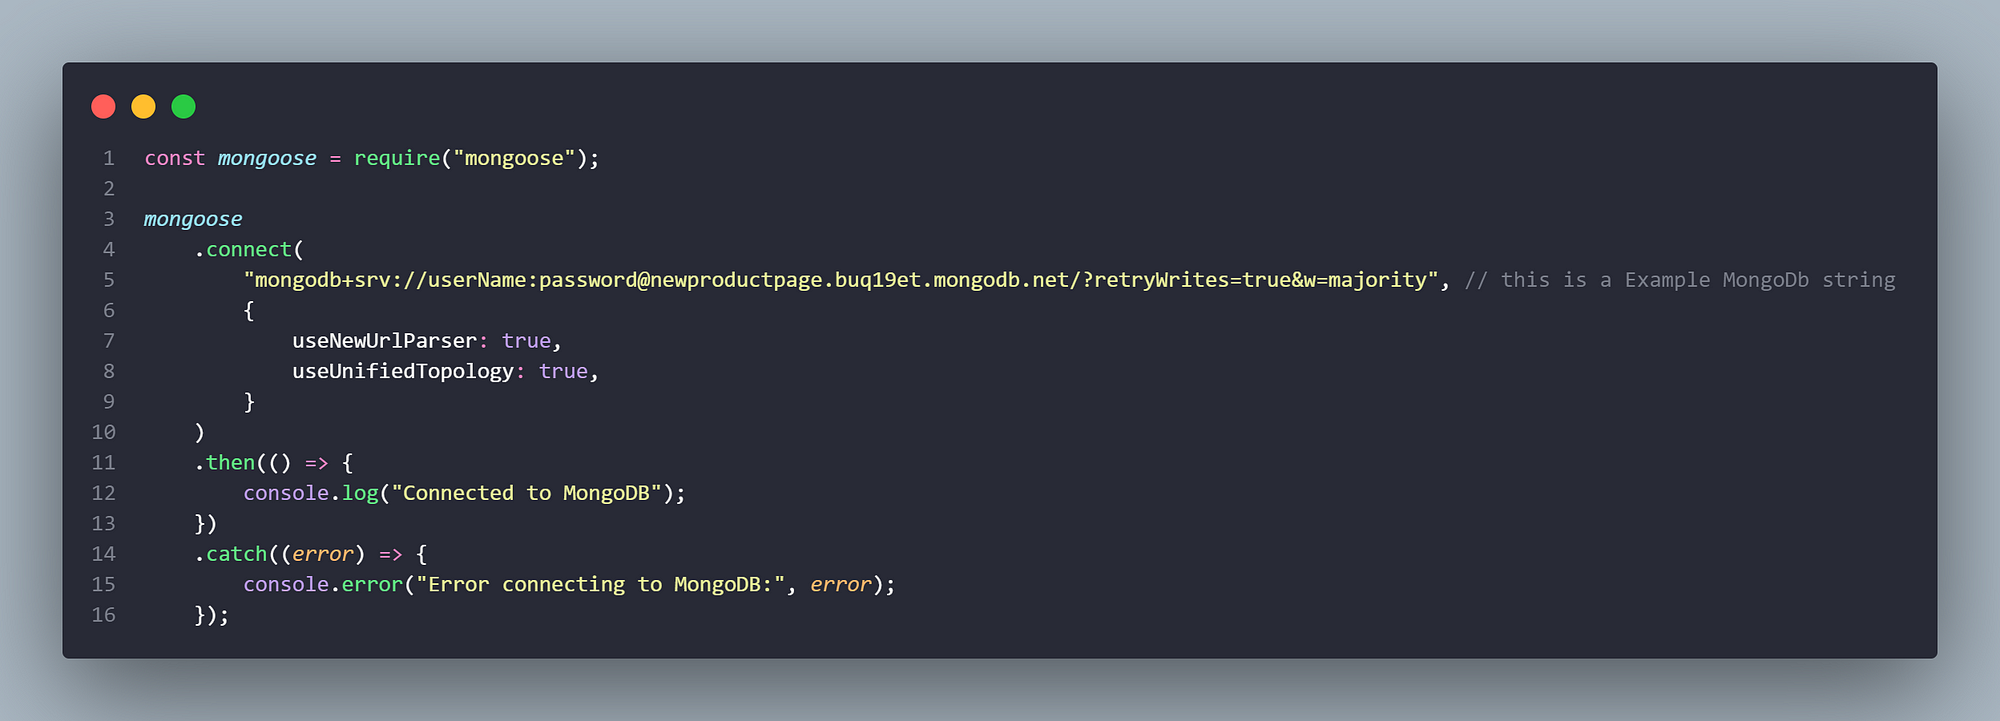
For more information regarding Database creation using MongoDB and also for exploring more Mongoose connection options you can check out the below links for your reference.
Let’s start creating a Winston Transport connection with MongoDB and a common logger function
Here we have created the
loggerservice.jsas a separate module to initialize the connection betweenWinstonandMongoDBand also created a common function that can be exported and used all over the controllers to capture errors or information that needs to be logged.
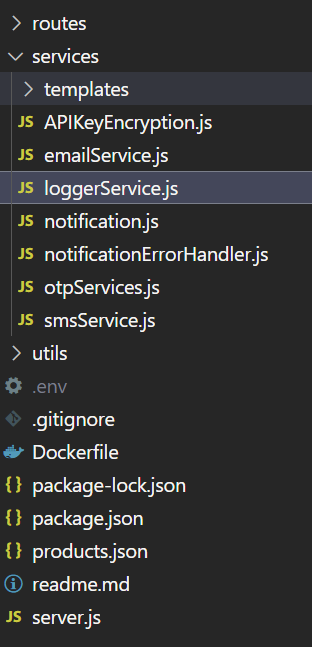
After creating the
loggerservice.jsfile we can add the necessary modules into the file.

Required modules
Now we need to define the
optionsobject with the desired configuration for the MongoDB transport:
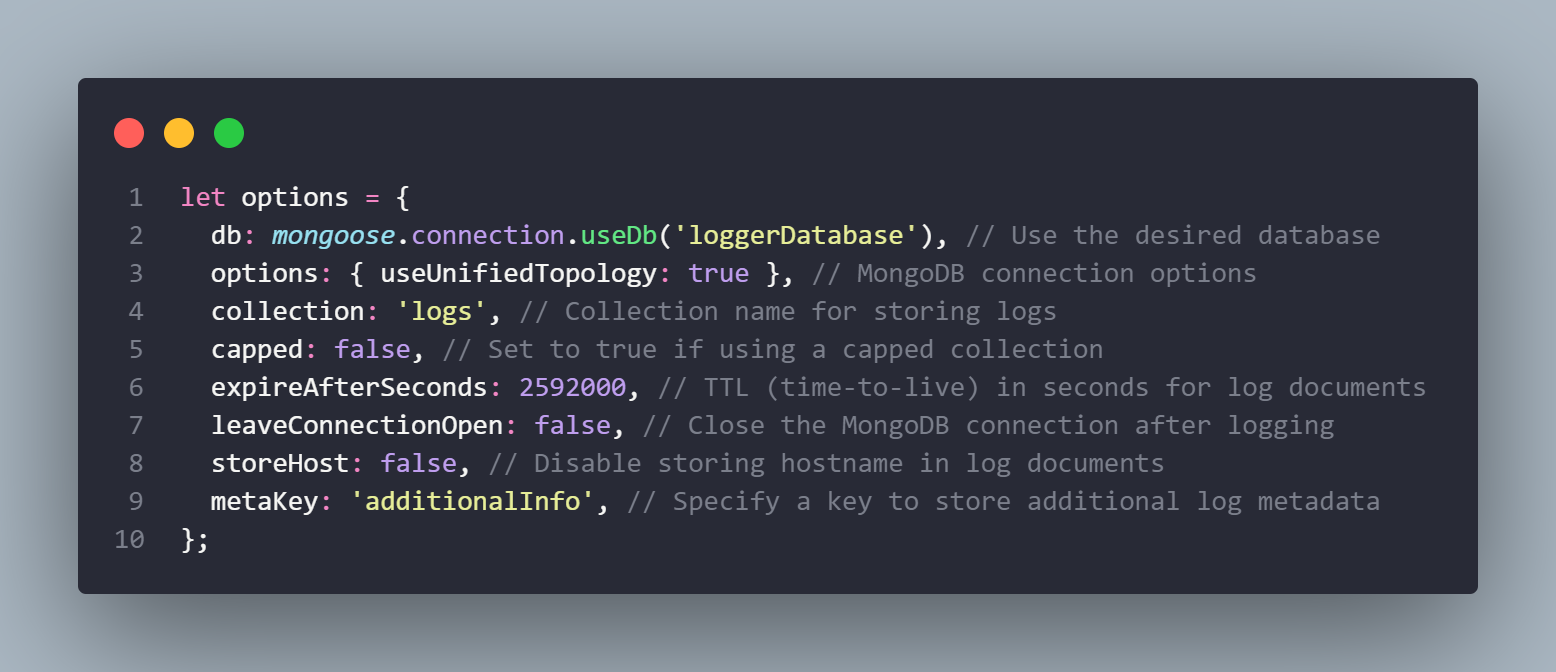
Options to be passed to Winston MongoDb Transport (loggerservice.js)
Next, we need to create a logger instance with the MongoDB transport:
Here we are using the
optionsobject as a parameter for the Winston MongoDb transport class.
![const log = winston.createLogger({
transports: [
new winston.transports.MongoDB(options),
],
});](https://miro.medium.com/v2/resize:fit:1400/1*a7NsGbTUSNdwx5-lN6QNPg.png)
Creating a Logger instance (loggerservice.js)
After creating the logger instance we can start constructing the logger function, i.e. used for creating logs all over the API endpoints.
In this example, we have proactively handled the errors that may occur during the logging process, in cases like when the connection to the database fails or if there is an error while logging.
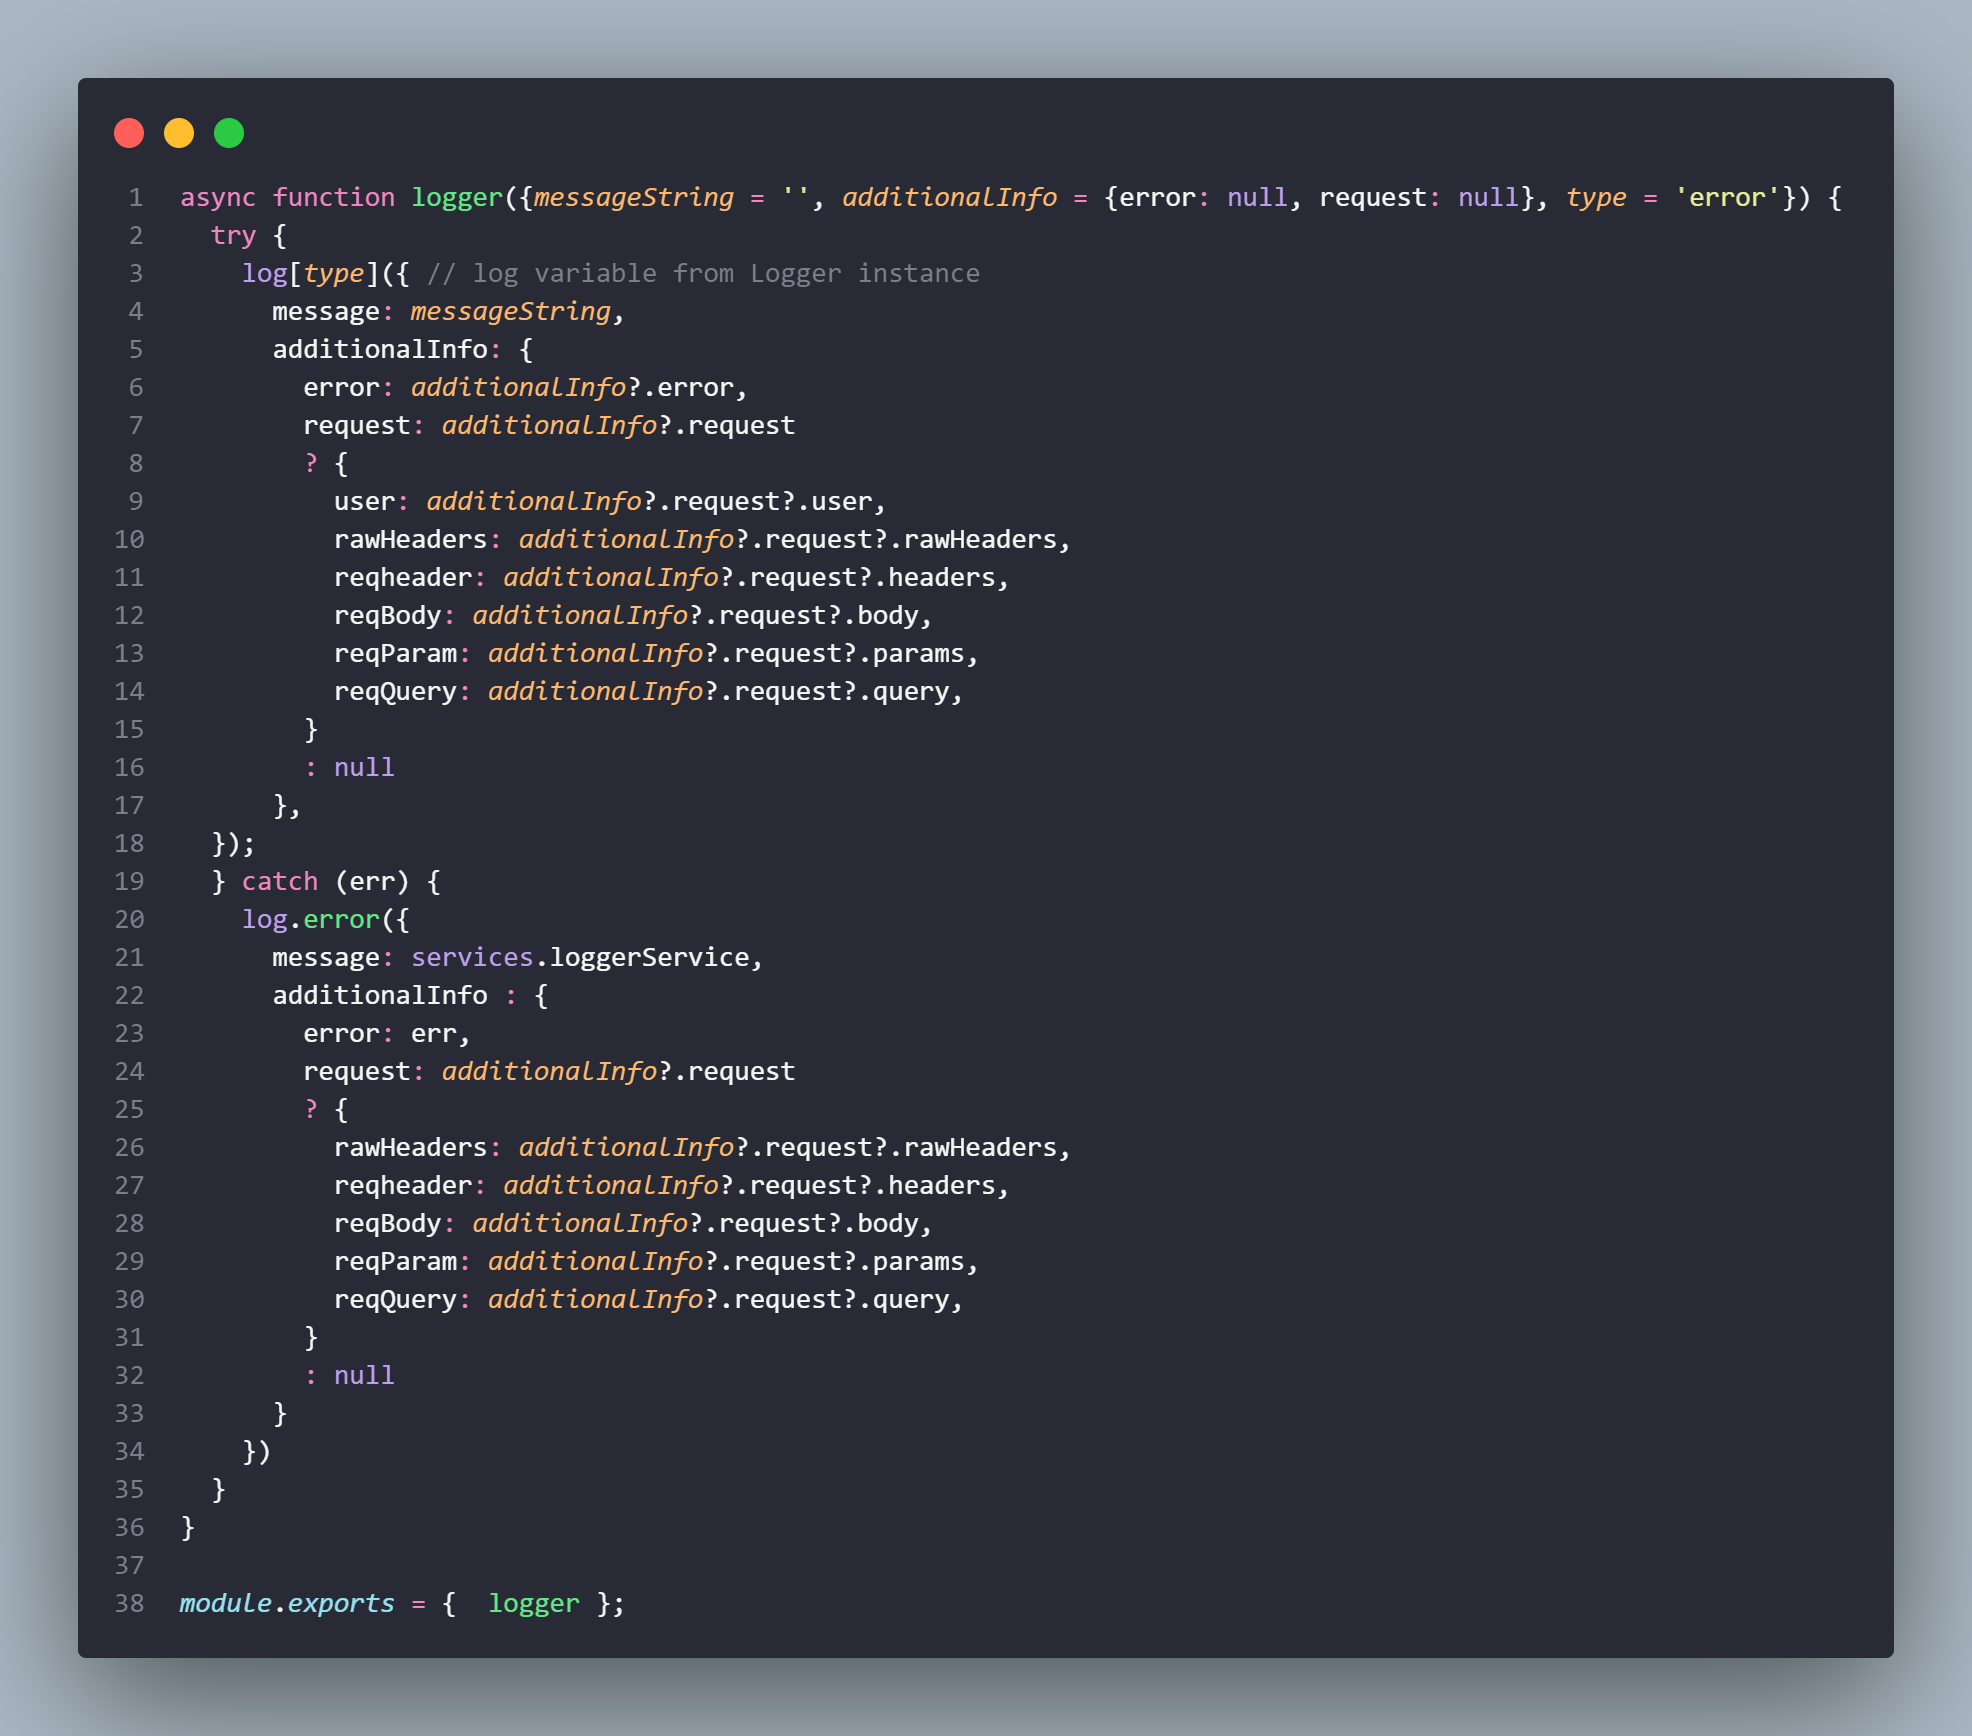
Customized logger function to create logs along with error handling block (loggerservice.js)
async function logger({messageString = '', additionalInfo = {error: null, request: null}, type = 'error'}) {
  try {
    log[type]({ // log variable from Logger instance
      message: messageString,
      additionalInfo: {
        error: additionalInfo?.error,
        request: additionalInfo?.request
        ? {
          user: additionalInfo?.request?.user,
          rawHeaders: additionalInfo?.request?.rawHeaders,
          reqheader: additionalInfo?.request?.headers,
          reqBody: additionalInfo?.request?.body,
          reqParam: additionalInfo?.request?.params,
          reqQuery: additionalInfo?.request?.query,
        }
        : null
      },
  });
  } catch (err) {
    log.error({
      message: services.loggerService,
      additionalInfo : {
        error: err,
        request: additionalInfo?.request
        ? {
          rawHeaders: additionalInfo?.request?.rawHeaders,
          reqheader: additionalInfo?.request?.headers,
          reqBody: additionalInfo?.request?.body,
          reqParam: additionalInfo?.request?.params,
          reqQuery: additionalInfo?.request?.query,
        }
        : null
      }
    })
  }
}

module.exports = {  logger };
Now let’s start using the exported logger function in our endpoints
1. Import the logger function from the desired module path:
Make sure to replace
'../../services/loggerService'with the actual path to the file that contains the logger code.

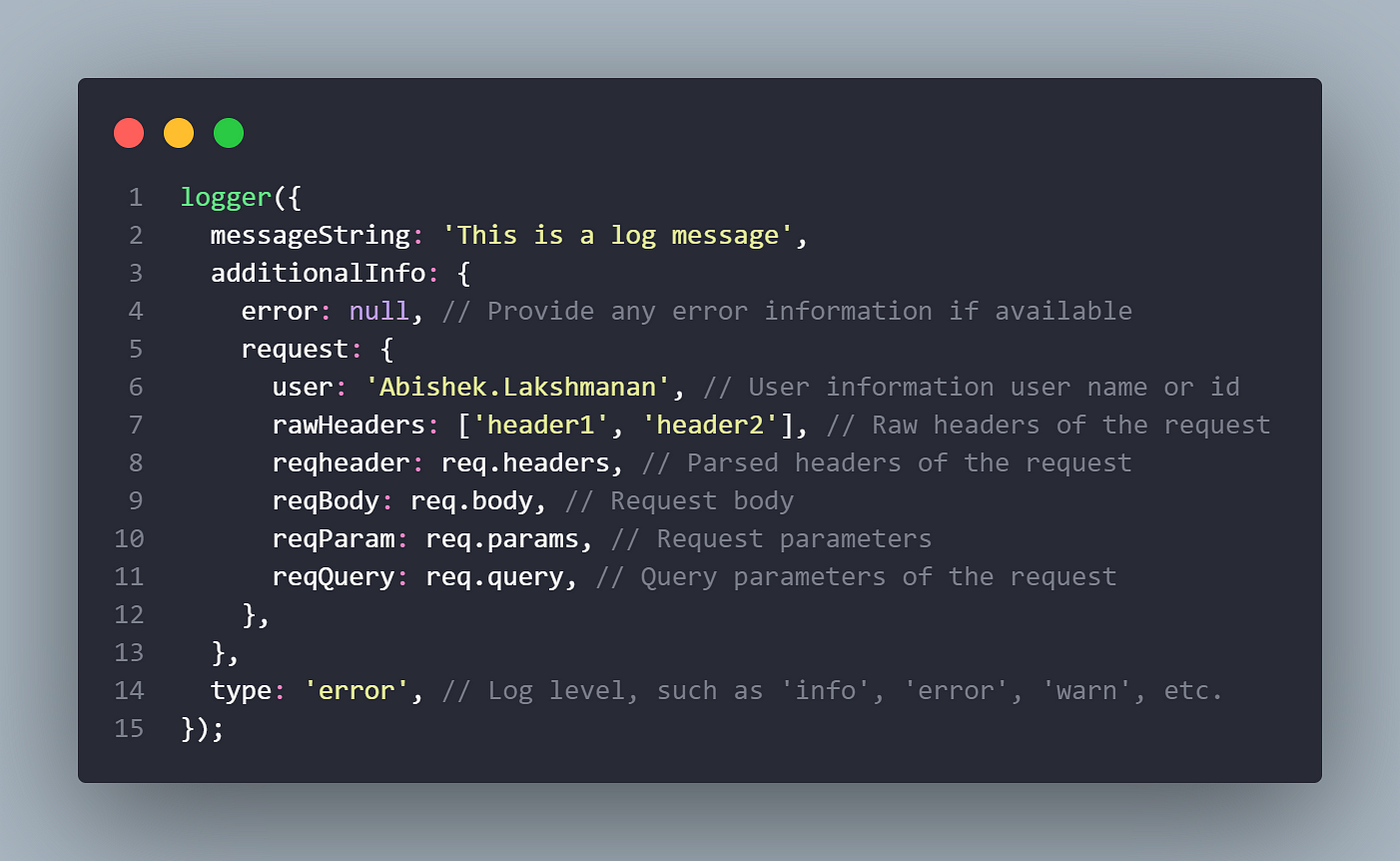
2. Call the logger function to log messages:
Adjust the parameters according to your requirements. The
messageStringrepresents the log message,additionalInfocontains any additional information to be logged, andtyperepresents the log level (defaulted to'error'in the function definition).This will log the specified message and additional
informationto the MongoDB database using thewinston-mongodbtransport.Make sure to handle any errors that may occur during the logging process, in cases like when the connection to the database fails or if there is an error while logging.
Visualizing the logs
There are plenty of 3rd party services available within Winston Transports for visualizing the logs as tables, graphs etc. As a first choice, we can choose Sentry which has a free Developers plan that works seamlessly and is cost-effective for startup projects at the Initial stages, other alternatives like Cloud Watch a well-known AWS service are also easily configurable with Winston on the go. By adding their respective Transport packages it is easy to transport the logs to the 3rd party services from Winston.
To sum it up
Integrating Winston with MongoDB allows us to log messages from our application to a MongoDB database. This provides centralized storage for our application logs, enabling easy retrieval, analysis, and monitoring. By configuring Winston with the MongoDB transport, we can effortlessly log messages to MongoDB and elevate the querying and indexing capabilities of the database for efficient log management.

